Having difficulty uploading files/plugins/themes to your WordPress website on Google Cloud Platform? This problem usually arises from file upload-size limits, which are imposed in your server’s php.ini file.
Although there are many ways to fix this problem, the best solution is to edit your server’s php.ini file directly – which is what you will learn in this tutorial.
Get Started
- 1. Connect to VM Instance
- 2. Switch to Root User
- 3. Change upload size limit
- 4. Restart Apache
1. Connect to VM Instance

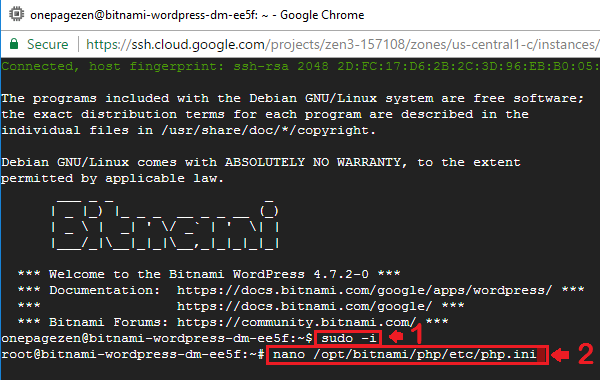
2. Switch to Root User

If you’re using Bitnami WordPress, your php.ini file is located at:
sudo nano /opt/bitnami/php/etc/php.iniIf you’re using Click-to-Deploy WordPress, your php.ini file is located at:
sudo nano /etc/php/7.0/apache2/php.ini
If you’re using the old Click-to-deploy stack with PHP5 (not PHP7), the php.ini file is located at the following location: sudo nano /etc/php5/apache2/php.ini
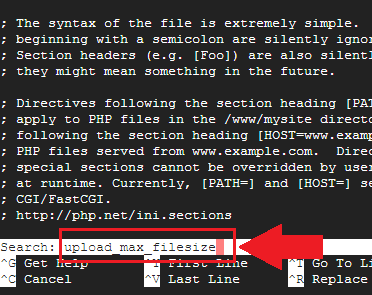
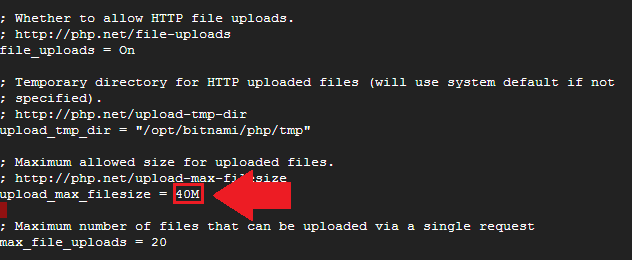
3. Change Upload Size Limit


4. Restart Apache

If you’re using Bitnami WordPress, restart your server by running:
sudo /opt/bitnami/ctlscript.sh restart apacheIf you’re using Click-to-Deploy WordPress, restart your server by running:
sudo service apache2 restartOptional Modifications
Some additional limits that you may want increase are:
- memory_limit = 64M
- upload_max_filesize = 64M
- post_max_size = 64M
- max_execution_time = 300
If you plan on importing large theme files, you may have to increase the upload size limit to over 128M.

